Growing Great Garlic
Garlic can be frustratingly easy to grow. Easy because we just plonk cloves of garlic in the soil. Frustrating because it is meant to be easy but so often we end up digging out tiny bulbs containing even tinier cloves. Here are some hints and tips to growing great garlic.
GETTING GARLIC TO PLANT
Make sure you start with good quality garlic that hasn’t been treated. Garlic sourced from overseas will have been treated to stop it sprouting quickly before export and then with methyl bromide once it reaches Australia by quarantine laws. Even Australian grown garlic may have been treated to slow down sprouting so that it has a longer shelf-life when being sold. This garlic will grow poorly if at all, so don’t bother. Get your garlic from a friend who has grown it, from an organic greengrocer, or from a nursery or accredited farmers market. You can also source it online from the growers or even websites such as Gumtree, Ebay or Farmhouse Direct. Just ask any growers what treatment their garlic may have had before sale.
SOIL PREPARATION
Prepare the soil before planting. Check your pH. It should be around the neutral mark and if it is lower than 6, add some lime or dolomite to raise the pH. Make sure the soil is friable to a deep level of at least 40cm. Shallow grown garlic will not grow large bulbs. Fork through some compost, or cow manure or other organic manure before planting. Some organic fertiliser such as concentrated manure pellets helps to get the garlic off to a good start. Once the soil is prepared then WAIT for a couple of weeks before planting. Garlic is not a heavy feeder but, like most plants, will appreciate a decent soil to start with.
POSITION AND SPACING
Choose a sunny spot in your garden. It prefers a dedicated bed as it dislikes root competition from neighbouring plants. If you don’t have much space, pop some cloves around your rose bushes to help deter green aphids, or in some larger and deep pots if you are really stuck for space containing some organic potting mix. Shallower pots will result in smaller bulbs.
The soil must be well drained and deeply friable. Garlic roots go down quite deeply and they will not be happy if there is water staying around the roots. Your developing garlic will rot quickly if the soil doesn’t drain well.
Garlic needs a decent chilling period to help develop larger bulbs, so it’s sometimes an idea to put it in the crisper section of your fridge for up to a month before planting, especially if you live in the warmer states.
When planting, separate the bulb into cloves and plant each one individually, about 5cm deep and about 15-20cm apart. If you have more than one row growing, space the rows up to 40cm apart. If you have plenty of space plant them the wider distance apart so that the bulbs have a larger space to develop more fully.
Plant them with the pointy tip upwards. Mulch with some loose straw after planting to a depth of about 3cm of cover. This also helps prevent weeds taking root close by. About a fortnight after planting you will see the green shoots appearing but this may take up to a month for some varieties. If you have garlic waiting to be planted, a tip of when they are ready to go in is just before the green tip emerges from the clove. You often can’t tell unless you cut one open and have a look. (This one will need to go in your cooking after cutting rather than the soil!).
Don’t plant piddly little cloves, as are often found in the centre of certain varieties of garlic bulbs. Use them in your cooking but not for planting. Larger heads will develop into larger bulbs. Straight after planting water in well and then wait.
WHEN TO PLANT*
Traditionally, garlic is planted on the shortest day of the year and harvested on the longest. That may be an easy mantra to remember, but try this instead – plant it earlier and then harvest when it is ready, not when the mantra dictates! Anytime from mid-March up until the shortest day (June 21st) is considered suitable for Melbourne and surrounds. Ideally though, get your garlic in before the end of May. The longer it has growing in cold soil, the better it will develop. You can expect to harvest about 7 to 8 months after planting for most varieties. March may even still be too warm to plant, so aim for no later than April/May to allow for a decently long time in cold soil.
VARIETIES
Now this is where things get interesting and I have to admit I’m out of my depth! I do know though, that different varieties have different flavours, heat, keeping powers etc etc. There’s a new world out there if you start getting into garlic, with it being judged just like a fine wine!!
ON-GOING CARE
- After planting, don’t ignore the garlic completely. Make sure the soil is kept evenly moist, even throughout winter, as a check in moisture represents a check in growth. If rainfall is inadequate then do remember to water.
- In spring, topping up with a good feeding mulch, such as peastraw, lucerne hay or sugarcane mulch, tucked in and around the plants is a good idea. Don’t dig it in as it will decompose naturally, feeding the bulbs as it does.
- Feeding the garlic after the shortest day (June 21) also helps as the leaves put on more rapid growth. The bulb develops with lengthening daylight hours, so feed fortnightly with an organic liquid feed alternating with liquid seaweed. Continue this regime until just prior to harvesting.
- Keep well weeded as the root competition from the weeds inhibits bulb development.
- In late spring the stalk develops further. At this stage, sometimes you can pull up one or two to enjoy as fresh garlic, or garlic leeks, stalk and all. It is on this stalk that flowers, or more correctly, the umbel may develop, though only on hard neck varieties.
HARVESTING
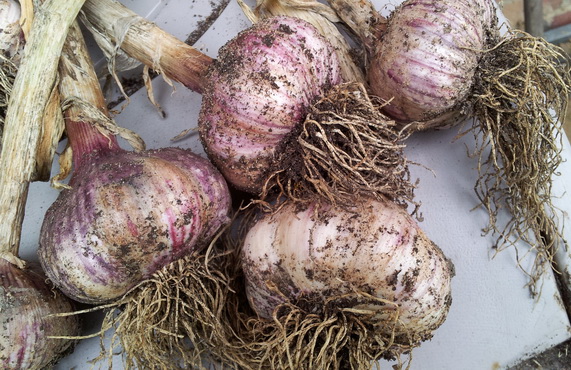
- Harvesting your garlic is best done as the growers do it. They wait to see when the leaves start to brown off. While there are still 4-6 green leaves, they check to see whether the cloves have developed, then wait for a hot dry day and prise the garlic out by lifting them gently. Leave them to dry in the sun for a short while to make the soil easier to brush off.
- Harden the garlic off in a sheltered sunny spot outside until the stalks and leaves have dried off. This may take a few weeks. When the leaves are dried, you can braid them in the traditional way and store in a cool, dry place (mine hang in the garage where they get a cross-breeze). The roots are best trimmed off so that they don’t act as a ‘wick’ for moist air and cause the garlic bulb to rot.
- Keep your best and largest bulbs to plant again next year!
PESTS AND DISEASES
- Black aphids get into the folds of the leaves and burrow into the developing bulbs. Act quickly when first noticed. Use a homemade soap spray to cover the leaves and drip down into the leaves. Then two weeks later, use pest oil; and alternate fortnightly until the problem is resolved.
- Rust is a problem when the garlic leaves are affected in autumn. This happens if the weather is still humid at the time of planting. Leave off planting until May if this is the case. If it happens in spring it doesn’t seem to affect the quality of the garlic. Remove the worse affected leaves. Using eco fungicide prevents further growth of the rust but it doesn’t get rid of existing. Use copper hydroxide if particularly a problem but copper affects soil microbes adversely so it is a last resort. Practice crop rotation.
Try these tips or see if they are any different to how you may have planted garlic in the past. Pulling it up is a very exciting time – especially if they are large bulbs!
* Note that the planting time refers to the southern states of Australia. Northern hemisphere garlic growers will need to add 6 months to the times noted.
Visit The Australian Garlic Industry Association for more information.